
V2/CMS Tutorial/User Tools/Creating Content/Automation/Alarm
From Senfi Docs
Add Alarm
See Pre-requisites for creating alarms for what you need before you can create alarms in Senfi.
Adding an Alarm can be broken down into three major steps:
- Create New Alarm
- Fill in General Information
- Add Flag (Optional)
Note: Mandatory fields are marked with an ‘*’. The following steps assume that the user is already logged in to the CMS.
Create New Alarm

- Go to the
 Automation tab.
 - Select the "ALARM" tab.
- Select
 ADD NEW. Go to Fill in General Information.
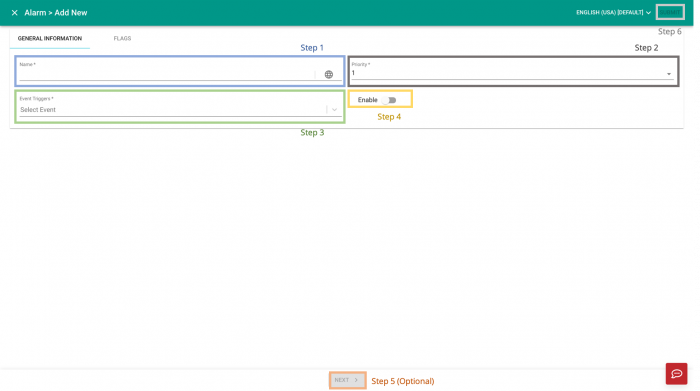
Fill in General Information
- Fill in the "Name" of the alarm.
- The "Name" can be filled in a different language by selecting
 Locale.
 - Available languages depend on your Organisation Settings.
- The "Name" can be filled in a different language by selecting
- Set the "Priority" of the alarm (Lowest: 1 - Highest: 9).
- Select the "Event Triggers".
- Only internal events created within the CMS can be selected.
- More than one event is allowed by selecting the events one by one.
- See Add Event to learn how to add an event to the CMS.
- Choose to
 enable or
  disable the alarm.
 - Go to Add Flag (Optional).
- Select "SUBMIT" (top right corner) to add the Alarm.