
V2/CMS Tutorial/User Tools/Creating Content/Automation/Event
From Senfi Docs
Add Event
See Pre-requisites for creating events for what you need before you can create events in Senfi.
Adding an Event can be broken down into three major steps:
Note: Mandatory fields are marked with an ‘*’. The following steps assume that the user is already logged in to the CMS.
Create New Event

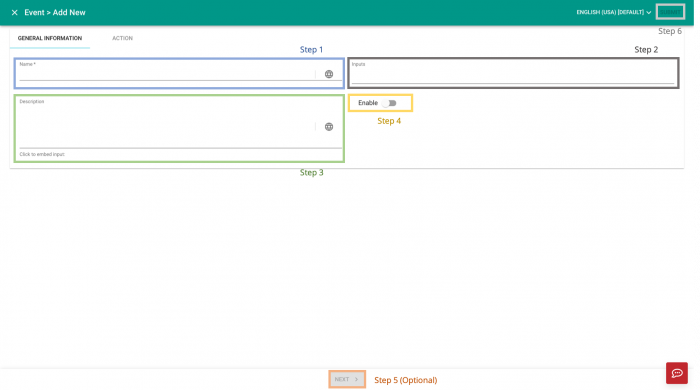
- Go to the
 Automation tab.
 - Select
 ADD NEW. Go to Fill in General Information.
Fill in General Information
- Fill in the "Name" of the Event.
- Fill in the Inputs of the event (Optional). When there are more than one input, fill in one at a time and press Enter key to capture it before entering the next one.
- Fill in the Description of the event (Optional).
- Choose to
 enable or
  disable the event.
 - Go to Add Action (Optional).
- Select "SUBMIT" (top right corner) to add the Event.
Tip: Both the name and description of the event can be specified in multiple languages by selecting  Locale. Available languages depend on your Organisation Settings.