
V2/Integrate/BACnet
From Senfi Docs
Contents
Senfi BACnet Adapter
The Senfi BACnet Adapter is available to onboarded partners only. If you would like to join as a Senfi partner, please send us an email with your organization name and contact details.
General
The Senfi BACnet Adapter integrates Senfi with BACnet compliant devices.
Features:
- Retrieving BACnet data-points through Polling or Change-of-value subscription.
- Writing data to writable BACnet data-points (aka sending Commands)
- Mass import BACnet address mappings using CSV.
Understanding BACnet
To understand BACnet, please read the first page of http://www.bacnet.org/Bibliography/HPAC-3-97.pdf
BACnet Adapter
Installation
- The installation of BACnet adapter has to be handled by G Element. Please contact us for the installation.
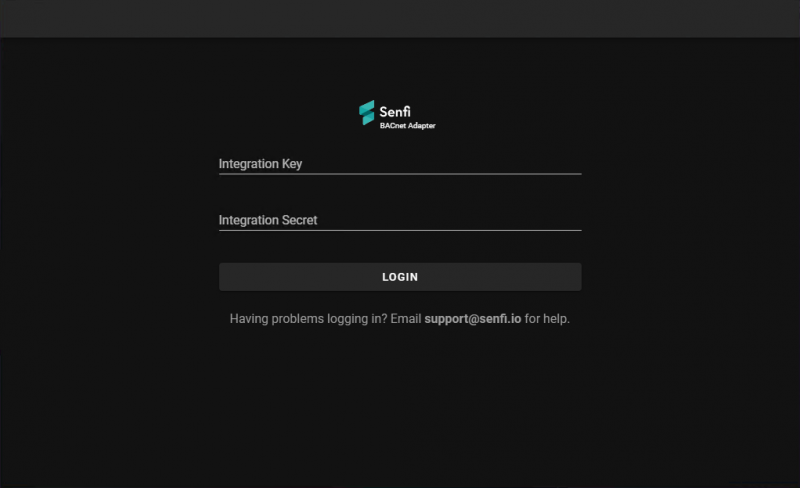
Login
- After installation, Senfi BACnet Adapter can be accessed with the following URL: http://localhost:22025/ui/login
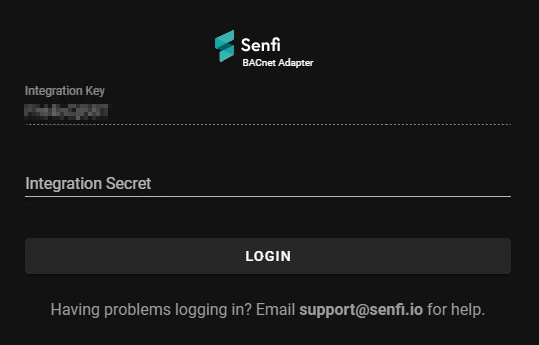
- Use an Integration Key & Secret pair to login. You may want to create a separate Integration Key & Secret pair for the BACnet Adapter, to control which Site, Measurement & Assets are accessible to it.
- If the Integration Key input field is pre-filled-in & greyed out, then the BACnet Adapter has already been activated using an Integration Key. You must use that particular set of Integration Key & Secret to log in.
Activation
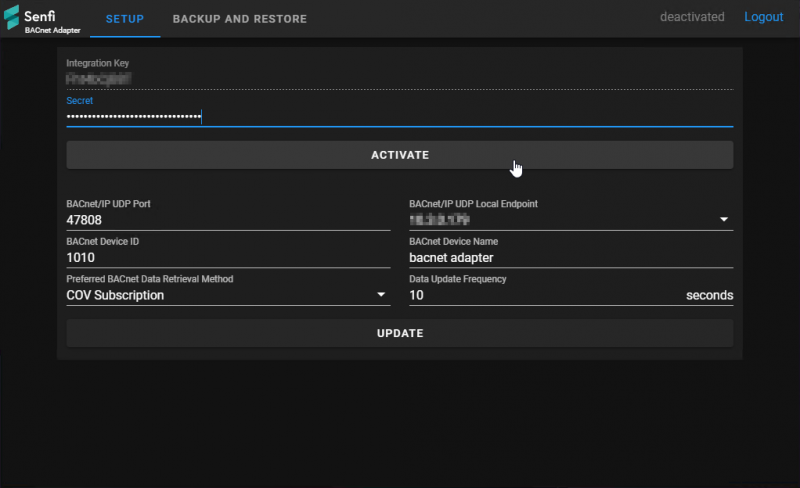
- Before you can begin to map BACnet Points to Senfi's measurement & metrics, you have to activate the BACnet Adapter. Fill in the corresponding Secret and click on "Activate". This serves as a confirmation to "Lock in" the Integration Key & Secret. Once activated, the BACnet Adapter will remember and use the Integration Key & Secret to publish data to Senfi. From here on, you can only use this Integration Key & Secret to log in to the BACnet Adapter.
Configuration
There are a few parameters to configure. You can leave most of them as default.
- BACnet/IP UDP Port
- This is the UDP Port that the BACnet Adapter's BACnet Client will listen on. It must be the same UDP Port as other BACnet devices you want to communicate with. This is usually 47808 (0xBAC in hex)
- BACnet/IP UDP Local Endpoint
- This is the IP Address of the network adapter that the BACnet Adapter will bind to and use to communicate with other BACnet devices. If you have multiple network cards/adapters on the machine, select the IP Address of the network card/adapter that is connected to the BACnet Network.
- BACnet Device ID
- This is the Device ID that BACnet Adapter's BACnet Client will use. Every BACnet device, regardless if they have any Objects to be read, must have a unique Device ID within the BACnet Network. Choose a number from 0 - 4194302, that no other BACnet device is using.
- BACnet Device Name
- This is the name that BACnet Adapter's BACnet Client will use. This is a human-friendly name, which does not have to be unique.
- Preferred BACnet Data Retrieval Method
- This is the preferred method which the BACnet Adapter will use to retrieve data from other BACnet Devices. COV Subscription is more efficient, but not all BACnet Devices supports it. If a BACnet Device does not support COV, the BACnet Adapter will automatically fall back to polling.
- Data Update Frequency
- How often to poll BACnet Devices for new data.
BACnet Mapping page
This is where you configure BACnet Adapter to pull data from BACnet Devices and push to Senfi measurement & metric.

- On initial load, you will be presented with a list of Assets that're accessible to the Integration Key & Secret. You can filter the list by Site, Measurement, or by preforming a search. Searchable fields are the Assets' name, ID and Tags.
- Of special note, the column "Mapped Metric" indicates how many optional tag + metric have been mapped, out of the total number of optional tag + readable metrics. An optional tag / metric is considered mapped only if all 3 of BACnet Device ID, BACnet Object Type and BACnet Object Instance have been set. (an Optional Tag is also considered mapped if its Constant Value is set)
- The column "Error" displays summarized error, if any, while retrieving BACnet Data for mapped points.
- Once you've located the Asset, click the "Pencil" icon on the left to start configuring BACnet Mappings for that Asset.
BACnet Mapping - Asset
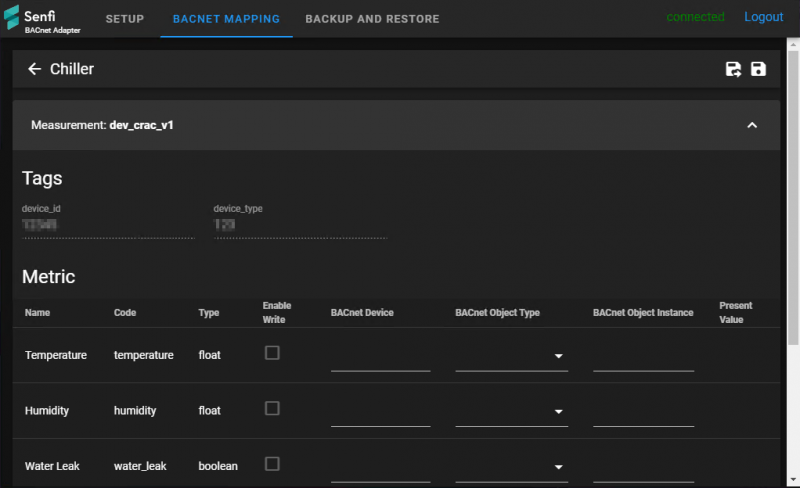
- After selecting the Asset, the Asset's measurements will be listed, with the first measurement expanded, and the rest collapsed.
- Within each Measurement panel, the Required Tags will be displayed for reference, then the mapping for Optional Tags (if any), and finally mappings for Metrics.
Optional Tags
- Optional Tags can obtain value from either a BACnet point, or from a constant value. Use Mapping Type: "BACnet" for the former, and "Constant" for the latter.
BACnet Mapping
- A BACnet Mapping consists of "BACnet Device ID", "BACnet Object Type" and "BACnet Object Instance". Once all 3 fields are set for a metric/optional tag, the present value of the BACnet point will be displayed at the right-most column. If the value cannot be retrieved, the error message will be displayed instead of the present value.
Enable Write
- For Metrics that are writable, the "Enable Write" checkbox will be checkable. Checking this checkbox will enable the Senfi Twin to write to the mapped BACnet Point. This checkbox exists as writing values to BACnet Points is a sensitive issue, and we want to give an extra layer of precaution against accidental writes (e.g. the metric was wrongly configured to be writable in Senfi CMS)
Import and Export page
Import
- This page allows you to import mappings through CSV file.
CSV File Specification
- The supported CSV format is RFC 4180, UTF-8. Saving as CSV from Excel should be compatible for most Excel versions.
- The imported CSV is split into 2 parts.
- Header
- Rows
- The first row of the CSV file is the header row. The header row identifies the data contained within each column. The value of the header cell tells the BACnet Adapter what to do with the column's data. For example, a column with header "Asset ID" tells the BACnet ADapter to use the value as the ID of the Asset being mapped.
- The value of each header cell must equal to Senfi-defined values, or conform to Senfi-defined format, which will be outlined in the Headers section below. Any columns with non-conforming headers will be ignored.
- Each subsequent row (2nd row onwards) in the CSV file is a BACnet Mapping to be configured.

Headers
- Asset ID - Required
- Measurement - Required, values are measurement_code
- Metric - Required, values are metric_code
- Optional Tag
- BACnet Device ID - Required
- BACnet Object Type - Required
- BACnet Object Instance - Required
- Constant Value
- Enable Write - values are TRUE or FALSE
Subsequent rows
- Asset ID must be defined for each row.
- Either Measurement & Metric or Optional Tag is defined
- Either BACnet Device ID & BACnet Object Type & BACnet Object Instance or Constant Value is defined.
- Only mappings for Optional Tag can define Constant Value, mappings for Metric must define BACnet Device ID & BACnet Object Type & BACnet Object Instance
- Enable Write can only be set to TRUE for writable Metric.
- Enable Write can not be set to TRUE for Optional Tag.
Export
- This page allows you to export all configured mappings to CSV, same format as used in import.
Backup and Restore page
- This page allows you to backup all configured mappings, and restore them to the same BACnet Adapter instance, or other BACnet Adapter instances. Only BACnet Mappings are backed up, other settings such as those shown on the Setup Page is ignored.
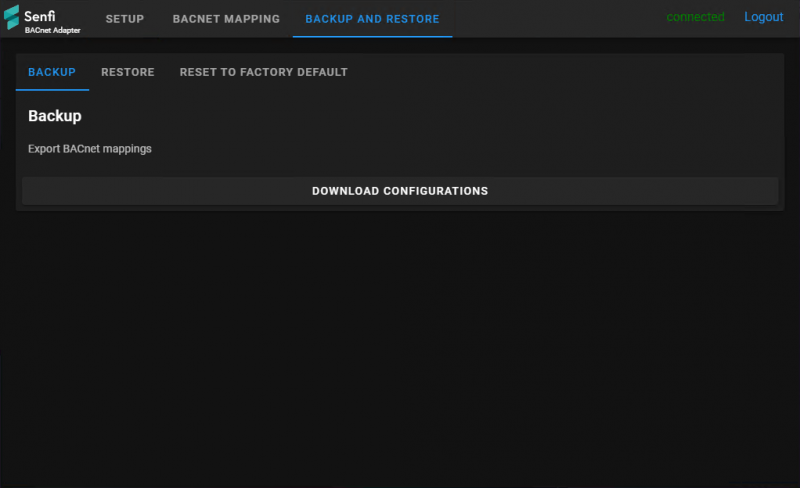
- To backup configured mappings, select:
- Backup and restore tab
- Backup tab
- Click on download configurations
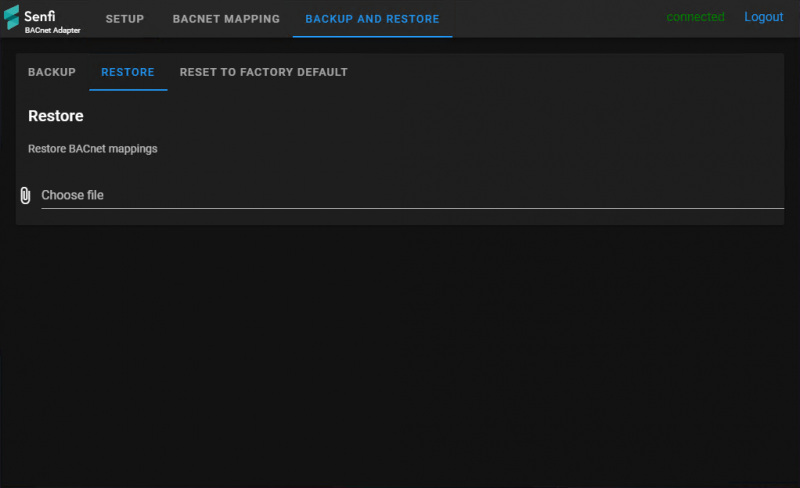
- To restore configured mappings, select:
- Backup and restore tab
- Restore tab
- File to restore mappings from
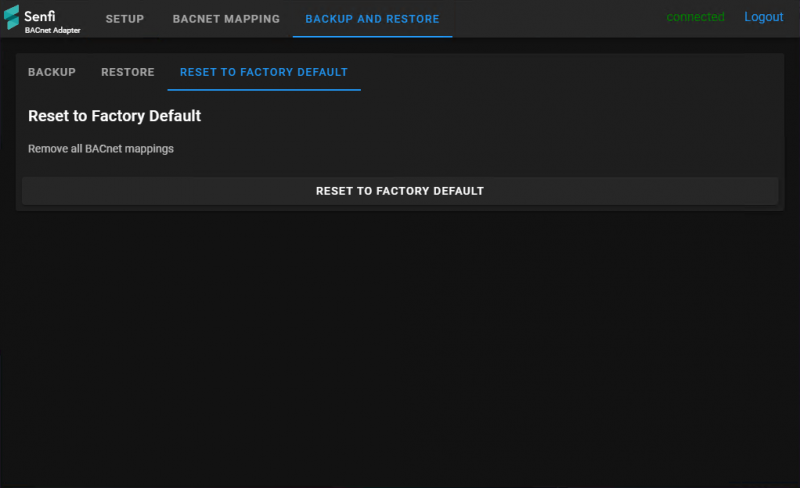
- To remove all BACnet mappings and reset to factory default, select:
- Backup and restore tab
- Reset to factory default tab
- Click on Reset to factory default