
V2/CMS Tutorial/User Tools/Creating Content/User/Access group
From Senfi Docs
Contents
Add Access Group
See Pre-requisites for Access Group creation for what you need before creating an Access Group.
Adding a User can be broken down into seven major steps:
- Create New Access Group
- Fill in Access Group Information
- Assign User (Optional)
- Assign Site & Asset (Optional)
- Assign Measurement (Optional)
- Assign Video (Optional)
- Assign Key (Optional)
Note: Mandatory fields are marked with an ‘*’. The following steps assume that the user is already logged in to the CMS.
Create New Access Group

- Go to the
 User tab.
 - Select the "ACCESS GROUP" tab.
- Select
 ADD NEW. Go to Fill in Access Group Information.
Fill in Access Group Information

- Fill in the "Name" of the Access Group.
- The "Name" can be filled in a different language by selecting
 Locale.
 - Available languages depend on your Organisation Settings.
- The "Name" can be filled in a different language by selecting
- Select the Parent Group (Optional).
- Users in the Parent Group will have at least the access rights of the subgroups.
- Go to Assign User (Optional).
- Go to Assign Site & Asset (Optional).
- Go to Assign Measurement (Optional).
- Go to Assign Video (Optional).
- Go to Assign Key (Optional).
- Select "SUBMIT" (top right corner) to add the Access Group.
Tip: To assign all items under a particular category (User, Site & Asset, Measurement, Video, Key) simply check the box at the header level.
Assign User
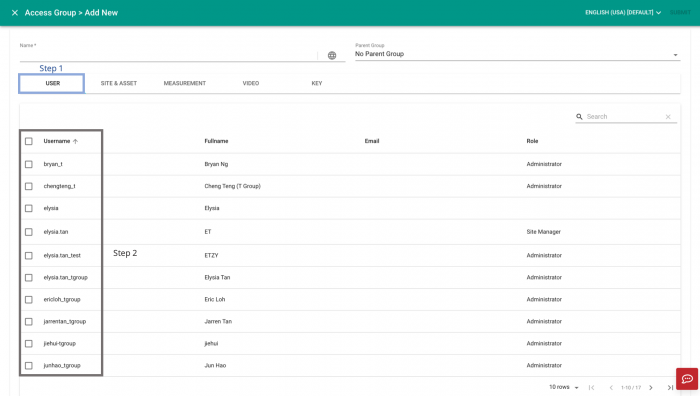
- Select the "USER" tab.
- Check the box beside the username of users who belong to the group.
Assign Site & Asset
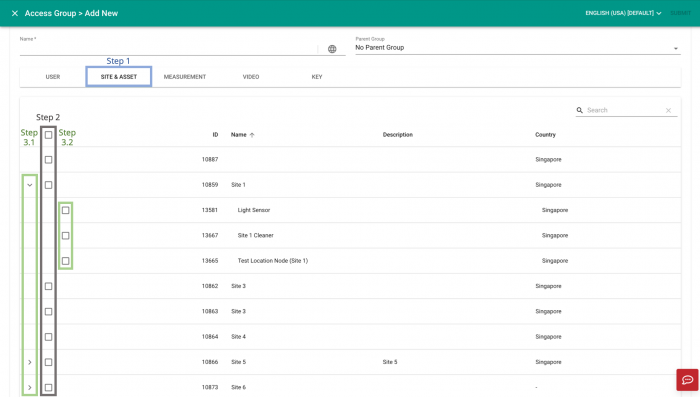
- Select the "SITE & ASSET" tab.
-
Assign Site:
- Check the box beside the ID of sites that belong to the group. Note: Assigning a site will automatically assign all the assets associated with the site.
- Check the box beside the ID of sites that belong to the group.
-
Assign Asset:
- View assets associated with a site by selecting the
 More button beside its ID.
 - Check the box beside the ID of assets that belong to the group.
- View assets associated with a site by selecting the
Assign Measurement
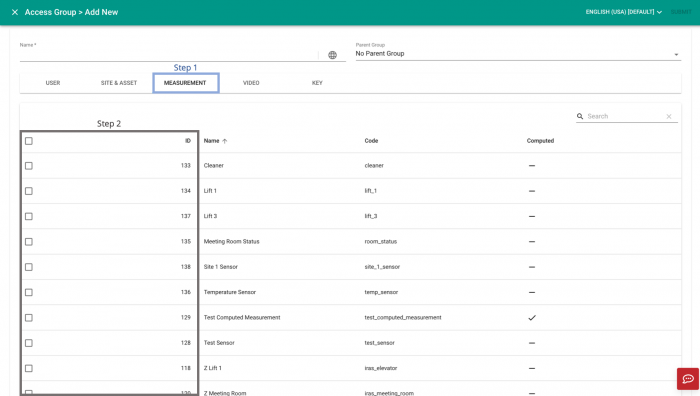
- Select the "MEASUREMENT" tab.
- Check the box beside the ID of measurements that belong to the group.
Assign Video
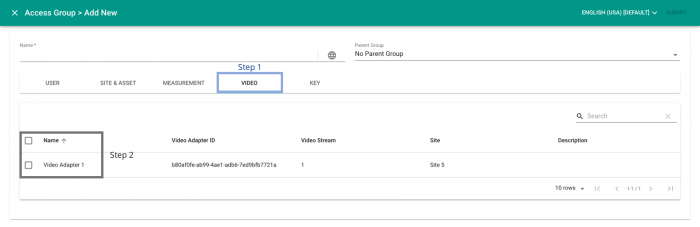
- Select the "VIDEO" tab.
- Check the box beside the Name of video adapters that belong to the group.
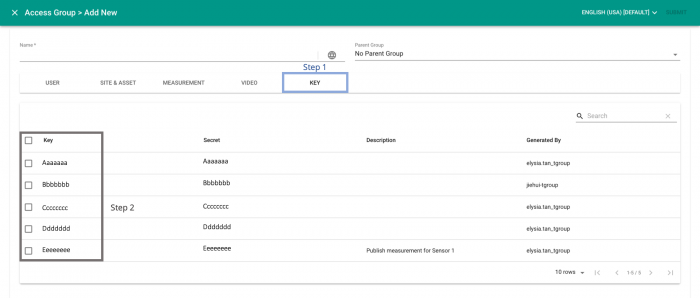
Assign Key
- Select the "KEY" tab.
- Check the box beside the keys that belong to the group.