
V2/CMS Tutorial/User Tools/Creating Content/Site/Add Site/Add Zone
Contents
Add Zone
Adding a zone to a site can be broken down into two major steps:
Introduction to the Zone Editor
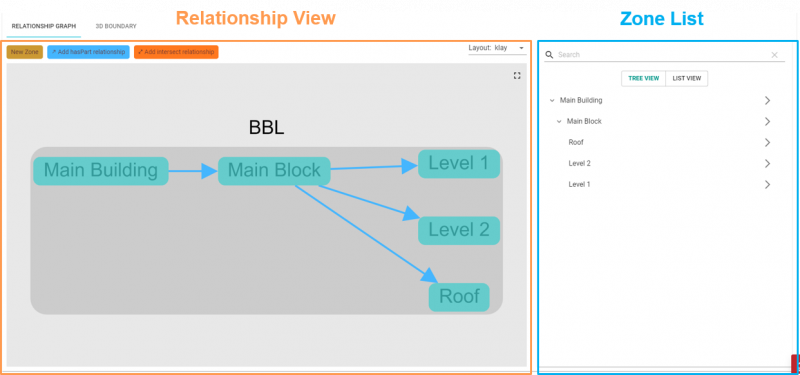
The zone editor is made up of three major components:
- Relationship Graph
- Displays all the relationship between zones in a site. User can add new relationships between zones in the relationship graph.
- 3D Boundary
- Displays all the boundaries of every zone defined in a site.
- Zone list
- Displays all the zones of a site in a list. Can be sorted in Tree view or List view.
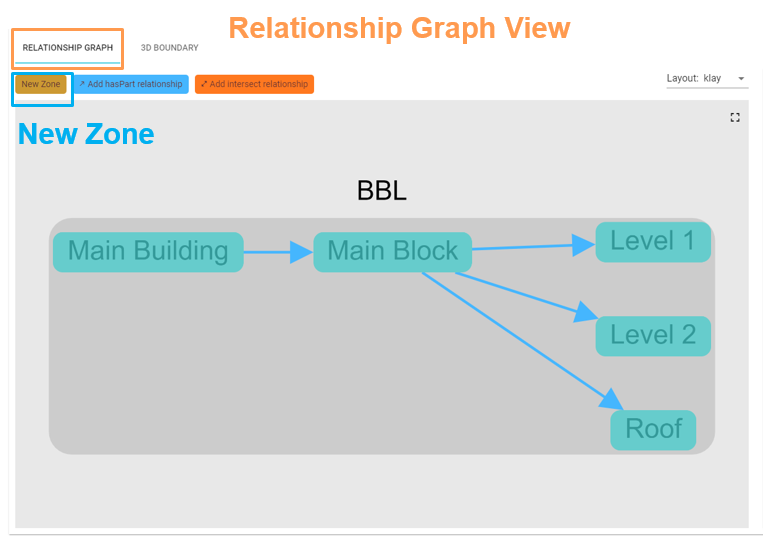
Relationship Graph
The relationship between zones in a site is displayed in the relationship graph editor.
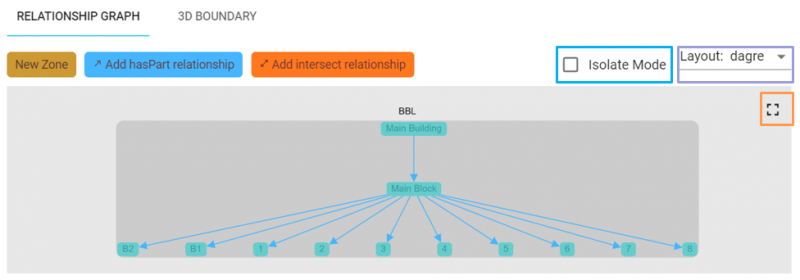
- BBL Zones
- Automatically created as zones when BBL is created and 3D objects are assigned to the BBL. All BBL zones are encompassed within a grey rectangle.
- New Zone
- Creates a new zone when clicked. The new zone will be placed outside of the grey rectangle which houses the BBL zones.
- Add hasPart relationship
- Adds hasPart relationship between two zones (connected by blue arrows).
- Add intersect relationship
- Adds intersect relationship between two zones (connected by orange arrows).
- Isolate Mode
- Isolates the selected zone and zones related to it.
- Layout
- Switches the relationship graph's layout.
- Zoom extends all
- Fit whole of relationship graph to canvas.
Zone List
All the zones in a site are displayed in the zone list.
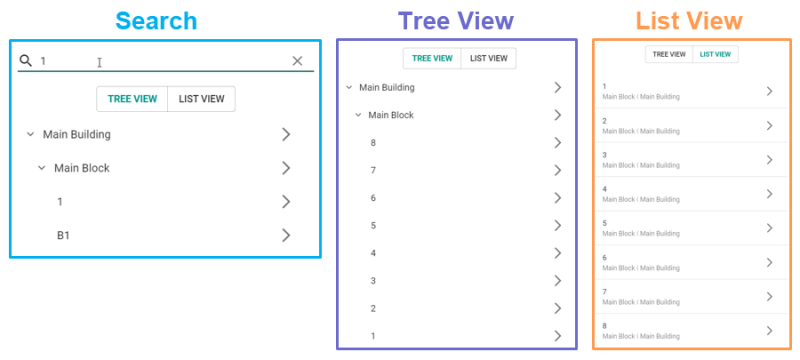
- Search
- Search function searches the zones available with the keyword.
- Tree View
- Displays the zones according to hierarchy. Parent zone can be collapsed or expanded as needed.
- List View
- Displays the zones according to alphabetical order.
- Edit Zone (>)
- Edits the selected zone.
3D Boundary
The 3D boundary view displays all the boundaries of every zone defined in a site.
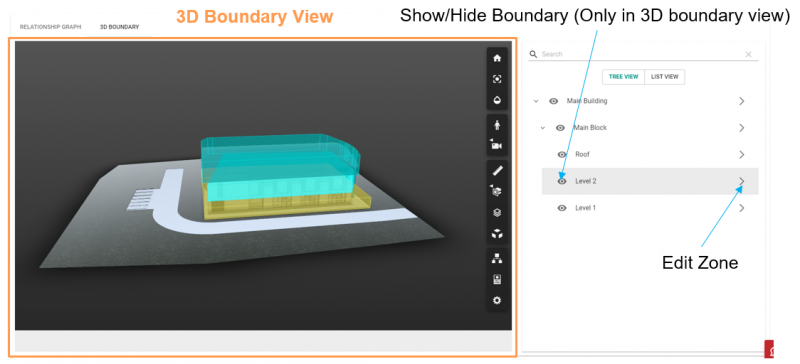
- Eye icon
- Show or hide 3D boundary of selected zone (Only available in the zone list when 3D boundary view is selected).
- Edit Zone (>)
- Edits the selected zone.
Adding Zone

- Go to the
 Site tab.
 - Select
 Edit beside the site you want to add zones for
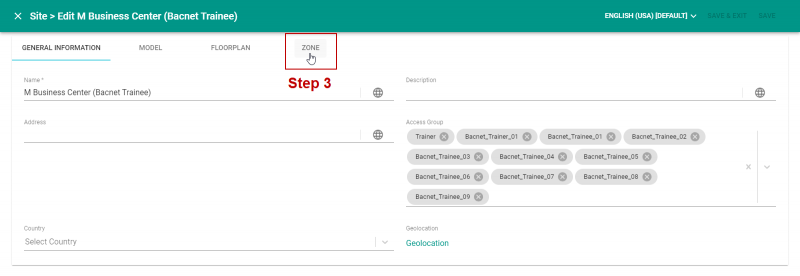
- Select the "ZONE" tab.
- Navigate to "RELATIONSHIP GRAPH" view
- Drag
 to Canvas or double click on the Canvas to add a new zone.
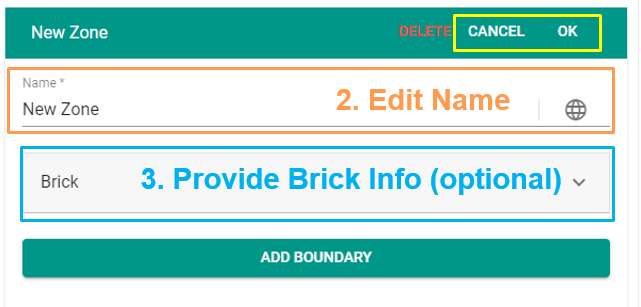
Edit Zone
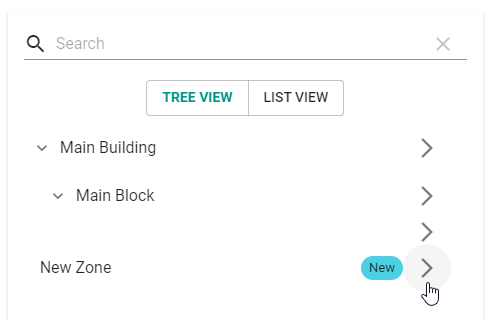
- Click
 beside the new zone.
- Edit zone name.
- Provide Brick Info (*Note: This is optional, but if you want to use this option, both location class and location name must be provided)
- Click OK to exit editing mode, Cancel to discard changes.
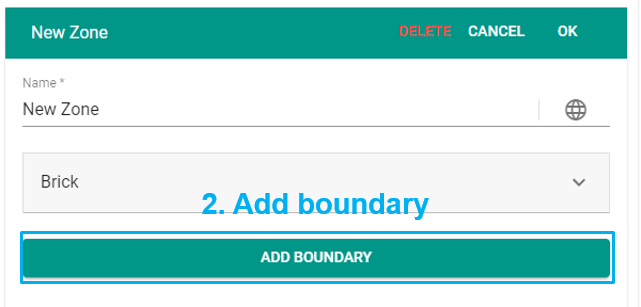
Add Zone Boundary
- Click beside the new zone.
- Click "ADD BOUNDARY" button
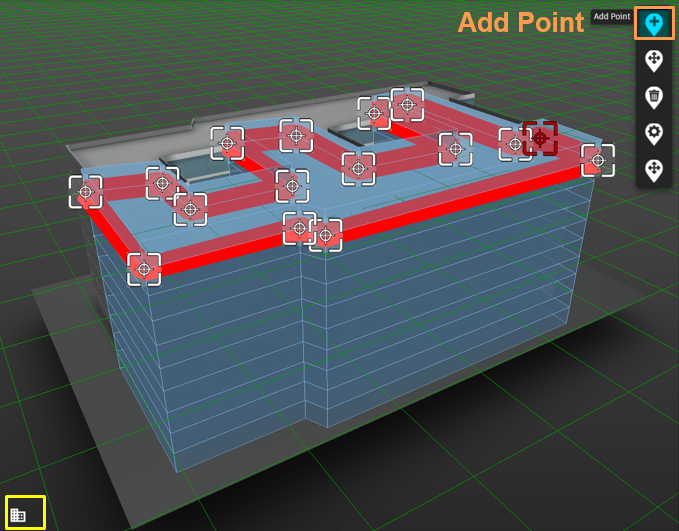
- In the "Add Point" mode, single click on 3D model to pick points of boundary. You can change between the various modes to aid in adding boundary:
-
 Add point
 -
 Select/Move point
 -
 Delete point
 -
 Volume edit settings (sets the volume's base height)
 -
 Translate (translates the whole volume according tot X/Y/Z input)
-
- Click
 to hide other zones' boundaries
 - Click
 to show/hide zones
 - Click
 to confirm the boundary
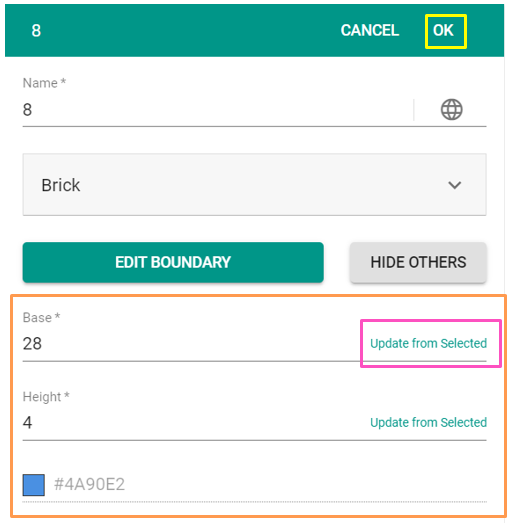
- Provide the boundary base, height and color
- You can select any object in the 3D scene and use "Update from Selected" to obtain the base or height information
- Click OK to complete
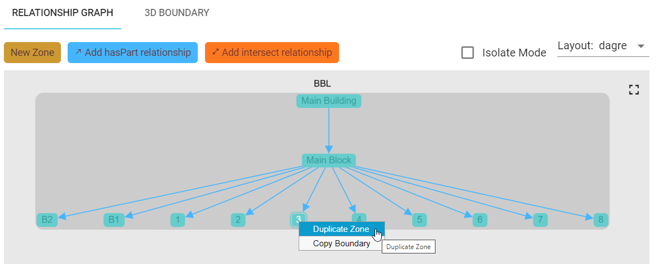
Duplicate Zone
Senfi provides duplicate zone function to enable users to make quick duplicates of existing zones. To do so, in the relationship graph view:
- Right-click on the zone that you want to duplicate
- Click "Duplicate Zone"
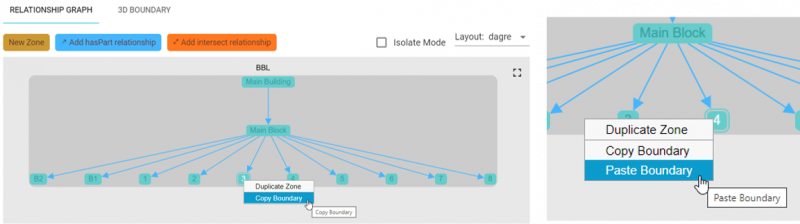
Copy Zone Boundary
Senfi provides copy zone boundary function to enable users to make copies of existing zones. This is especially helpful for cases where the rooms are of the same shape and sizes across the levels. To do so, in the relationship graph view:
- Right-click on the zone that you want to copy boundary from
- Click "Copy Zone Boundary" (*function is only available when zone to copy from has boundary)
- Right-click on zone that you want to paste copied boundary to
- Click “Paste Boundary” (only available when copied boundary)
Add Relationship
Senfi allows users to define relationships between zones. You can either add hasPart (for zones that is subset of another zone) or intersect (for zones that only partially intersect with another zone) relationship.
Add hasPart Relationship
- In the Relationship Graph View, select the zone that you want to add hasPart relationship from
- Click

- Click on the zone that you want to add hasPart relationship to
- You can terminate relationship adding at any point of time by clicking anywhere on canvas
Add intersect Relationship
- In the Relationship Graph View, select the zone that you want to add intersect relationship from
- Click

- Click on the zone that you want to add intersect relationship to
- You can terminate relationship adding at any point of time by clicking anywhere on canvas
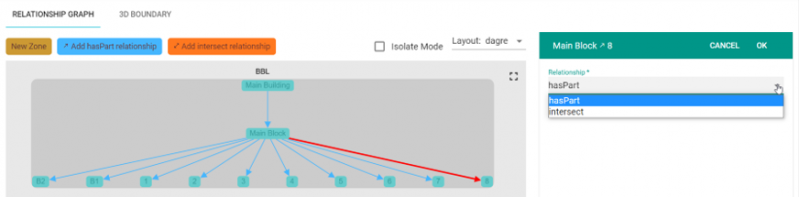
Edit Relationship
To edit the relationship type:
- In Relationship Graph view, click on relationship arrow
- Change relationship type
- Click “OK”