
V2/CMS Tutorial/User Tools/Creating Content/Site/Add Site/2D Floorplan
From Senfi Docs
Contents
Add 2D Floorplan
Adding a 2D Floorplan to a site can be broken down into three major steps:
Note: Mandatory fields are marked with an ‘*’. The following steps assume that the user is already logged in to the CMS.
Add Floorplan

- Go to the
 Site tab.
 - Select
 Edit beside the site you want to add floorplans for.
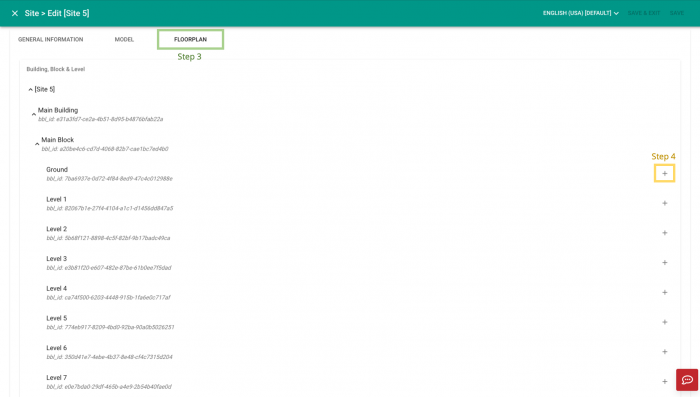
3. Select the "FLOORPLAN" tab.
4. Select the ![]() Add button beside Level Name to add a floorplan for that level. Go to Upload Floorplan.
Add button beside Level Name to add a floorplan for that level. Go to Upload Floorplan.
Upload Floorplan
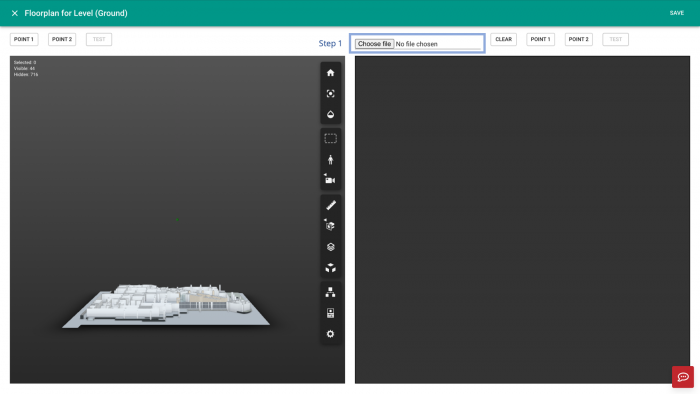
- Upload floorplan image file. Go to Add 2D and 3D Reference Points.
Add 2D and 3D Reference Points
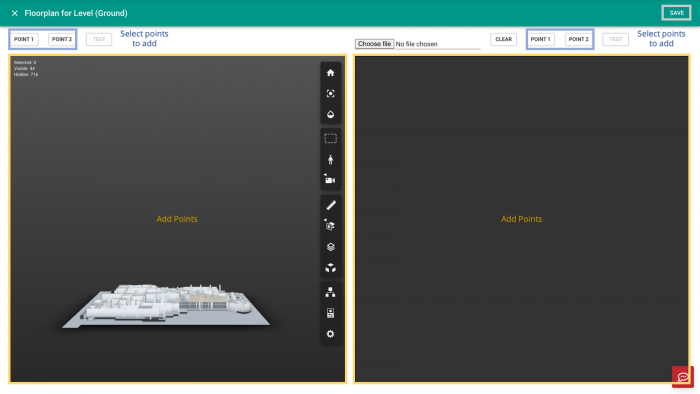
- Select "POINT 1" above the 2D Floorplan.
- Drop the point onto the required position on the 2D Floorplan.
- Repeat the above 2 steps for "POINT 2".
- Repeat the above 3 steps for the 3D Floorplan.
- Select "SAVE" (top right corner) to save the floorplan.

Tip: Reference points can be tested by selecting the "TEST" button.